
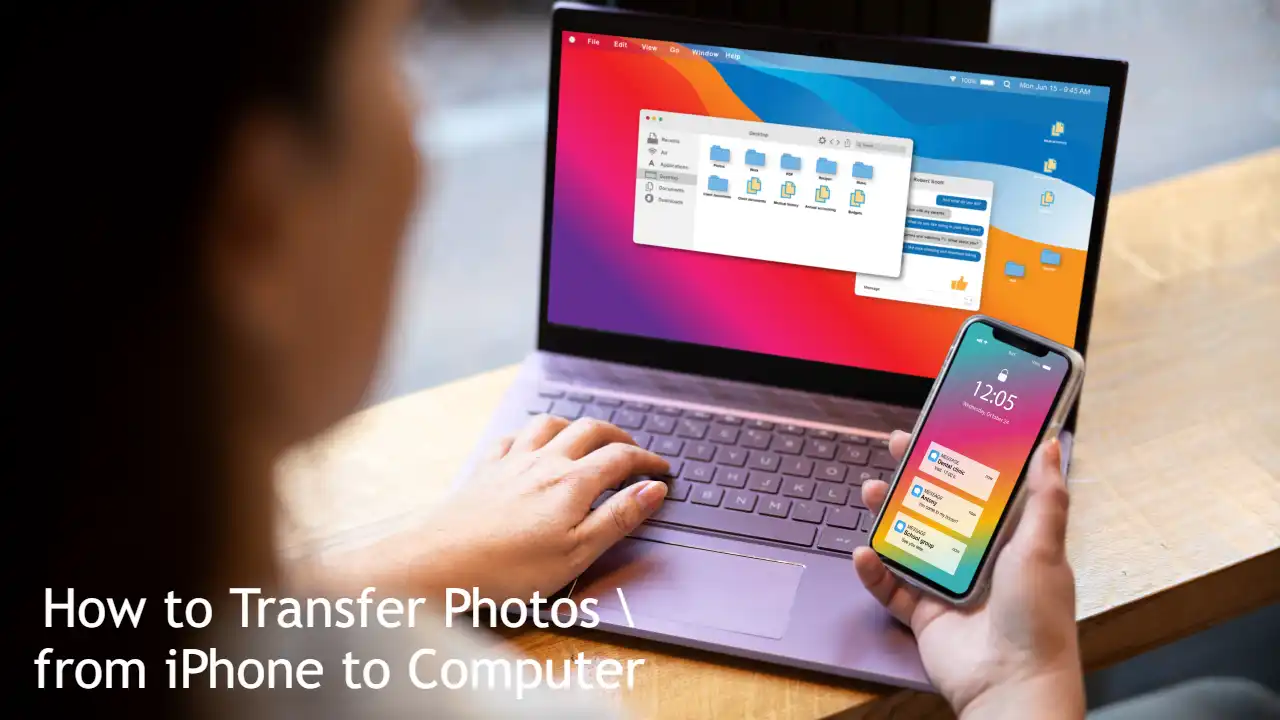
How to Transfer Photos from iPhone to Computer: Quick Guide
Here is the information: Do you need to transfer photos from your iPhone to your laptop or Windows computer?
Its just simple If you have iTunes, you can easily import photos using Windows’ built-in Photos app. although you can also manually import photos by using the File Explorer.
However, if you don’t want to connect your device to your computer via wires, you can use iCloud to transfer photos over Wi-Fi.
This CrackHow (Quick Guide) will show you how to transfer photos from your iPhone to a Windows PC.
While each system has its own unique approach, understanding the general principles behind photo transfer can help you troubleshoot common issues and optimise your workflow.
Whether you’re a casual photographer or someone who relies heavily on iPhone photography, mastering these transfer techniques can save you time and prevent data loss.
As we delve into each method, consider which one best suits your needs and available resources.
Important Things You Should Know
- You must have iTunes installed when using the Windows Photo app to import photos.
- Connect your phone to your PC, then open iTunes. Open the Photos app and click the import icon. Select From a connected device, then choose your photos.
- When using the File Explorer, right-click your connected iPhone, then click Import pictures and videos. Click Import all new items now.
Using the Photos App
Connect your iPhone to the PC. Use the USB charging cable that came with your phone.
- If this is the first time connecting your iPhone to the computer, you will need to tap Trust on the iPhone and then enter your iPhone’s passcode, Touch ID, or Face ID.
- Be sure to update your iPhone.
- Open Photos: The Photos app should automatically launch. If not, open it manually by searching for “Photos” in Spotlight or finding it in the Applications folder.
- Select Import: Click on your iPhone in the sidebar under “Devices.” This will display all the photos available for import. Select the photos you wish to import by clicking on them.
- Import Photos: Click “Import Selected” to transfer specific photos, or “Import All New Photos” to move everything that hasn’t been imported yet. This step ensures that all your recent captures are safely transferred without duplication.
The Photos app not only simplifies the import process but also allows you to organise your images within albums, making it easier to manage large photo libraries. Once imported, you can use the app’s editing tools to enhance your images.
Using AirDrop
AirDrop is a wireless option for transferring photos, making it ideal for quick transfers without the need for cables. This feature uses Bluetooth and Wi-Fi to establish a secure connection between Apple devices.
- Enable AirDrop: Swipe up on your iPhone to access the Control Centre and ensure AirDrop is enabled. Choose either “Contacts Only” or “Everyone,” depending on your privacy preference.
- Open Photos: On your iPhone, open the Photos app and select the photos you want to transfer. You can select multiple photos by tapping “Select” in the top right corner.
- Share via AirDrop: Tap the “Share” icon, select your Mac from the AirDrop options, and the photos will transfer wirelessly. Once the transfer is complete, you’ll receive a notification on your Mac confirming the receipt of files.
AirDrop’s convenience and speed make it a popular choice for those who frequently transfer files between Apple devices. It’s especially useful in scenarios where internet connectivity is limited or when you’re on the go.
Transferring Photos from iPhone to Windows PC
For Windows users, the process is slightly different but still simple. Although the Windows ecosystem doesn’t provide the same seamless integration as Apple’s, several tools and methods can facilitate an effective transfer.
Using File Explorer
- Connect Your iPhone: Use a USB cable to connect your iPhone to your Windows PC. Ensure your iPhone is unlocked for the connection to be recognised.
- Trust the Computer: On your iPhone, you might need to tap “Trust” to allow the connection. This step is crucial for security and ensures that your device communicates with the computer.
- Open File Explorer: Navigate to “This PC” and find your iPhone under “Devices and drives.” This section will display your iPhone as a storage device.
- Access Photos: Open the “DCIM” folder, which contains all your photos. Browse through the subfolders to find your desired images.
- Copy Photos: Select and copy the photos you want, then paste them into a folder on your PC. Organise them in a manner that suits your needs for easy access later.
Using File Explorer provides a direct method for file transfer, allowing you to manually manage your photo files. This approach is favored by users who prefer a straightforward, no-frills method.
Using the Windows Photos App
- Connect Your iPhone: Again, use a USB cable to connect your iPhone. Make sure the device remains unlocked throughout the process.
- Open Photos App: Launch the Photos app from the Start menu. This app provides a more visual interface for managing your photo imports.
- Import from USB: Click on “Import” in the top right, then select “From a USB device.” Choose your iPhone and the photos you wish to transfer. The app will guide you through selecting the photos you want to import, offering options to delete them from your iPhone once transferred.
The Windows Photos app offers additional features, such as editing tools and organizational capabilities, to help you manage your photo library effectively.
Transferring Photos from iPhone to Android
Switching from iPhone to Android involves a few more steps, but it’s manageable with the right tools. As these platforms are fundamentally different, leveraging third-party solutions can bridge the gap for a seamless transition.
Using Google Photos
- Download Google Photos: Install the Google Photos app from the App Store on your iPhone. This app acts as a cloud-based storage solution for your photos.
- Backup Photos: Open the app, sign in to your Google account, and enable “Backup & sync” to upload your photos to the cloud. This process ensures that your photos are safely stored online and accessible from any device.
- Access on Android: Install Google Photos on your Android device and sign in with the same Google account to access your photos. This allows you to download or view your images directly from the app.
Google Photos not only facilitates cross-platform transfers but also provides features like automatic organization, photo editing, and sharing options.
Using a Computer as an Intermediary
- Transfer to Computer: First, transfer your photos from the iPhone to a computer using one of the methods above. This step acts as a backup and ensures you have a local copy of your photos.
- Connect Android: Connect your Android device to the same computer using a USB cable. Ensure your Android device is set to “File Transfer” mode to allow data exchange.
- Copy Photos: Move the photos from the computer to your Android device’s storage. Organize them into folders for easy navigation on your Android device.
Using a computer as an intermediary provides more control over the transfer process and allows you to organise your photos before moving them to your Android device.
Tips for a Smooth Transfer
Ensure Enough Storage
Before starting any transfer, make sure there’s enough storage space on your destination device. Running out of space mid-transfer can disrupt the process and potentially lead to data loss. Consider deleting unnecessary files or moving them to an external storage device to free up space.
Keep Devices Charged
Transfers can take time, especially if you’re moving a large number of photos. Make sure both devices are adequately charged or plugged in to avoid interruptions. A stable power supply ensures that the transfer process can be completed without unexpected shutdowns.
Use High-Speed Cables
High-speed USB cables can significantly reduce transfer times, especially when dealing with a large number of high-resolution images. Investing in quality cables can improve data transfer rates and enhance the overall efficiency of the process.
Troubleshooting Common Issues
Connection Problems
If your computer doesn’t recognise your iPhone, try using a different USB port or cable. Also, ensure your iPhone is unlocked and that you’ve tapped “Trust” when prompted. It’s also worth checking if the drivers for your devices are up to date, as outdated drivers can lead to connectivity issues.
Slow Transfer Speeds
Slow transfers might be due to outdated software. Check for updates on both your iPhone and computer, and restart both devices if necessary. Ensuring that your operating systems and apps are current can resolve many performance-related issues.
Missing Photos
If some photos don’t transfer, it could be due to iCloud settings. Make sure photos are downloaded locally on your iPhone by checking your iCloud settings. You may need to disable “Optimize iPhone Storage” to ensure all photos are available for transfer.
Conclusion
Transferring photos from your iPhone to a computer or another device doesn’t have to be a chore. With the right method and tools, you can easily move your memories to a safer place or a new device. Always ensure your devices are updated and backed up regularly to keep your data secure.
By following this guide, you should be able to transfer your iPhone photos with ease. Now, you can enjoy your photos across all your devices, preserving your cherished moments for years to come. Remember, regular maintenance of your devices and digital assets can prevent data loss and ensure a seamless experience across various platforms.

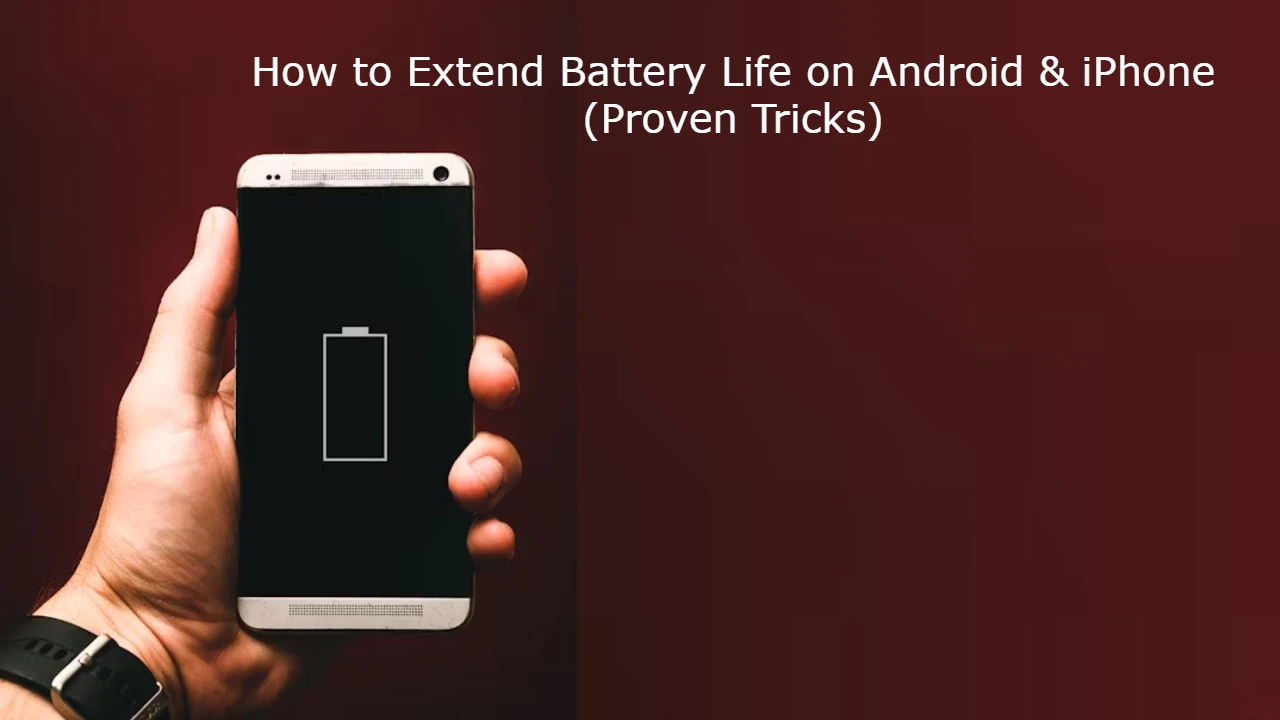
Few things are more frustrating than your phone battery running out in the middle of the day. 😩 Whether you use an Android or iPhone, battery drain is one of the most common smartphone issues.
The good news? You don’t need a new phone or a bigger battery—just a few smart tweaks can make your battery last much longer.
In this guide, we’ll cover proven tricks to extend battery life on both Android and iPhone, with step-by-step instructions you can follow right now.
📌 Why Does Smartphone Battery Drain Fast?
Common reasons your battery doesn’t last:
-
🔆 Screen brightness too high
-
📱 Too many background apps running
-
📡 Always-on features (Wi-Fi, Bluetooth, GPS, 5G)
-
🔔 Frequent notifications
-
⚙️ Software or app bugs
-
🔋 Old battery health
✅ Quick Fixes to Save Battery Instantly
Before diving into detailed steps, try these simple fixes:
-
Lower brightness or use Auto-Brightness
-
Turn on Battery Saver / Low Power Mode
-
Close apps running in the background
-
Switch to Airplane Mode when you don’t need network
🛠️ Step-by-Step: Extend Battery Life on Android
1. Enable Battery Saver Mode
-
Open Settings → Battery → Battery Saver.
-
Turn it on manually or set it to activate automatically at low charge.
👉 This limits background activity and reduces power usage.
2. Lower Screen Brightness & Use Dark Mode
-
Go to Settings → Display → Brightness → Reduce brightness.
-
Enable Dark Mode for supported apps (uses less power on OLED screens).
📌 Dark Mode can save up to 30% battery on OLED phones.
3. Turn Off Location & Bluetooth When Not Needed
-
Swipe down → Quick Settings → Turn off GPS & Bluetooth.
-
Or go to Settings → Location and disable unnecessary apps from using location.
4. Restrict Background Apps
-
Go to Settings → Apps → Battery Usage.
-
Select apps draining power → Restrict background activity.
👉 Apps like Facebook, Instagram, and TikTok are common culprits.
5. Update Apps & Software
-
Open Google Play Store → Profile → Manage apps → Update all.
-
Go to Settings → System → System update to update Android.
📌 Updates often fix bugs that drain battery.
6. Disable Always-On Display & Extra Animations
-
Settings → Display → Always-On Display → Off.
-
Settings → Developer Options → Reduce animations.
7. Replace Battery if Health is Low
-
Dial
*#*#4636#*#*(some devices) → Battery info. -
Or use AccuBattery app to check battery health.
-
If capacity is below 80%, consider replacing the battery.
🛠️ Step-by-Step: Extend Battery Life on iPhone
1. Enable Low Power Mode
-
Go to Settings → Battery → Low Power Mode.
-
Or ask Siri: “Turn on Low Power Mode”.
👉 iPhone reduces background refresh, email fetch, and visual effects.
2. Optimize Screen Settings
-
Settings → Display & Brightness → Auto-Brightness ON.
-
Enable Dark Mode for OLED models.
3. Disable Background App Refresh
-
Settings → General → Background App Refresh → Off.
👉 This stops apps from consuming battery in the background.
4. Turn Off Location Services
-
Settings → Privacy & Security → Location Services.
-
Disable location for apps that don’t need it.
5. Manage Push Notifications
-
Settings → Notifications → Turn off for unnecessary apps.
-
Fewer notifications = fewer screen wake-ups.
6. Check Battery Health
-
Settings → Battery → Battery Health & Charging.
-
If Maximum Capacity < 80%, it’s time to replace the battery.
7. Update iOS & Apps
-
Settings → General → Software Update.
-
Open App Store → Profile → Update All.
📹 Bonus: Video Walkthrough
👉 Add a screen recording video showing:
-
How to enable Low Power Mode (iPhone)
-
How to restrict background apps (Android)
-
Before & after battery performance
This increases engagement + helps visual learners.
⚡ Pro Tips for Both Android & iPhone
-
Avoid extreme temperatures (hot/cold damages battery)
-
Use original chargers (fake ones reduce lifespan)
-
Don’t let battery drain to 0% regularly
-
Charge between 20% – 80% for best health
-
Restart your phone once a week to refresh system
📝 Final Thoughts
With these proven battery-saving tricks, you can easily make your Android or iPhone last longer throughout the day.
Start with simple changes like enabling Battery Saver/Low Power Mode, reducing screen brightness, and disabling unnecessary background apps. For long-term results, check your battery health and replace it if needed.
🔋 Remember: A little optimization goes a long way toward keeping your phone alive when you need it most!

Building your own gaming PC is one of the smartest ways to save money while getting the performance you want. Instead of paying extra for prebuilt systems, you can pick the right parts, assemble them yourself, and enjoy a machine that’s powerful, upgradable, and cost-efficient.
In this 2025 budget gaming PC guide, we’ll walk you through:
-
Choosing the right components without overspending
-
Step-by-step assembly process
-
Common mistakes to avoid
-
Proven tips to maximize performance
Whether you’re a first-time builder or upgrading an old rig, this guide has you covered.
💸 Why Build a Budget Gaming PC in 2025?
-
Cheaper than prebuilt PCs – No markup for assembly.
-
Custom performance – Choose parts based on your games.
-
Easily upgradable – Swap parts instead of buying a whole new system.
-
Better cooling & efficiency – DIY builds often run cooler and quieter.
📌 Step 1: Decide Your Budget
For 2025, here’s a rough budget guide:
-
$500 – $700 → Entry-level gaming (1080p, medium settings)
-
$700 – $1,000 → Mid-range gaming (1080p/1440p, high settings)
-
$1,000+ → High-end gaming (1440p/4K, ultra settings, future-proof)
👉 Pro Tip: Always leave 10–15% of your budget aside for accessories (keyboard, mouse, monitor).
📌 Step 2: Choose the Right Parts
Here’s what you need for a gaming PC:
🧠 CPU (Processor)
-
Budget-friendly: AMD Ryzen 5 5600 or Intel Core i5-12400F
-
Balanced performance for gaming + multitasking
🎮 GPU (Graphics Card)
-
Entry: NVIDIA RTX 3050 / AMD RX 6600
-
Mid-range: RTX 3060 Ti / RX 6700 XT
-
Affordable & capable of smooth 1080p/1440p gaming
🏗️ Motherboard
-
Match CPU socket type (AM4 for Ryzen, LGA1700 for Intel)
-
Look for B550 (AMD) or B660 (Intel) chipsets for budget builds
💾 RAM
-
Minimum: 16GB DDR4 (3200MHz)
-
Budget gamers don’t need 32GB unless streaming or heavy multitasking
💽 Storage
-
500GB NVMe SSD (fast boot & load times)
-
Optional: Add 1TB HDD for extra game storage
🔌 Power Supply (PSU)
-
At least 550W – 650W, 80+ Bronze certified
-
Never cheap out on PSU (affects stability & safety)
🖥️ Case
-
Mid-tower with good airflow
-
Budget-friendly options: Cooler Master, NZXT, DeepCool
❄️ Cooling
-
Stock coolers are fine for budget CPUs
-
Add 1–2 case fans for better airflow
📌 Step 3: Gather Your Tools
-
Phillips-head screwdriver
-
Anti-static wrist strap (recommended)
-
Clean workspace with good lighting
📌 Step 4: Step-by-Step Assembly
1. Prepare Case & Motherboard
-
Unbox the case, install standoffs for motherboard
-
Place motherboard carefully
2. Install CPU
-
Lift CPU socket lever
-
Align CPU notch with socket
-
Place CPU → Close lever
3. Install RAM
-
Open RAM slots → Insert sticks until they click
-
Use dual-channel (slots 2 & 4 usually)
4. Install Storage (SSD)
-
Insert NVMe SSD into M.2 slot → Screw it in place
-
Or mount SATA SSD with cables
5. Install GPU
-
Insert into PCIe slot → Secure with screws
-
Connect power cables (if required)
6. Install Power Supply
-
Place PSU in case (bottom/rear)
-
Connect 24-pin ATX & CPU power cables
7. Cable Management
-
Route cables behind case for airflow
-
Tie them with zip ties
8. First Boot
-
Connect monitor, keyboard, mouse
-
Power on → Enter BIOS (Del/F2 key)
-
Check system detects CPU, RAM, Storage, GPU
📌 Step 5: Install Operating System
-
Create a Windows 11 USB installer (or Linux for budget builds)
-
Boot from USB → Install OS
-
Install latest drivers from manufacturer websites
🛠️ Common Issues & Fixes
-
No Display? → Check GPU cable & RAM seating
-
PC Doesn’t Power On? → Ensure PSU switch is ON & cables connected
-
Overheating? → Reapply thermal paste, add case fans
📹 Bonus: Video Tutorial
👉 Record or embed a step-by-step video showing:
-
CPU & GPU installation
-
Cable management tips
-
First boot & BIOS settings
This helps beginners follow along visually.
⚡ Pro Tips for Budget Builders
-
Buy parts during sales (Black Friday, seasonal deals)
-
Consider refurbished GPUs/CPUs for extra savings
-
Prioritize GPU > CPU for gaming performance
-
Don’t overspend on fancy RGB—focus on performance first
📝 Final Thoughts
Building a budget gaming PC in 2025 is easier than ever, and it saves you money while giving you more control.
With the right parts, smart assembly, and good cable management, you can enjoy smooth gaming at 1080p or even 1440p—without breaking the bank.
👉 Start small, upgrade later, and remember: a well-built PC can last you 5–7 years with minor upgrades.
Method 1: Using a Microsoft Account and Digital License
If you purchased Office 2021 online from Microsoft or a trusted vendor, you might have received a digital license. This method doesn’t require a traditional product key. Here’s how to activate your Office using a Microsoft account.
Step 1: Install Microsoft Office 2021
First, you need to install Microsoft Office on your device. If you haven’t already installed it, follow these steps:
- Go to the Microsoft Office website:
- Open your browser and go to the official Microsoft Office download page.
- Sign in to your Microsoft account:
- If you don’t have an account, you’ll need to create one.
- Download the installer:
- Click “Install Office” and download the installer file.
- Run the installer:
- Open the downloaded file and follow the on-screen instructions to install Office 2021.
Step 2: Activate Using Microsoft Account
Once Office 2021 is installed, follow these steps to activate it via your Microsoft account:
- Open any Office app (Word, Excel, PowerPoint, etc.).
- When you open the app for the first time, it will ask for activation. Select “Sign In” with your Microsoft account.
- Sign in with the account that you used to purchase or register Office 2021 (the account associated with your digital license).
- Activate Office:
- Once signed in, the activation process will be automatic, and Office will be activated without needing a product key.
Note: If you purchased Office through Microsoft 365, the subscription will be recognized, and you will be activated without any need for a product key.
Step 3: Verify the Activation Status
To ensure that your Office installation has been activated:
- Open any Office app (e.g., Word or Excel).
- Go to File > Account (or Office Account).
- Under the Product Information section, you should see “Product Activated” and your Microsoft account listed.
Method 2: Using Microsoft Support and Recovery Assistant
If you’ve already purchased Office 2021 but are having trouble with activation, you can use Microsoft’s Support and Recovery Assistant tool.
Step 1: Download the Microsoft Support and Recovery Assistant
- Go to the Microsoft Support and Recovery Assistant download page:
Download Microsoft Support and Recovery Assistant - Click “Download Now” to start the download.
- Run the downloaded tool.
Step 2: Run the Tool
- Open the tool after installation.
- Choose “Office Activation” from the list of issues.
- Select “I’m having trouble activating Office” and follow the on-screen instructions.
- The tool will troubleshoot the issue and attempt to resolve any activation problems related to your Microsoft account or digital license.
Step 3: Complete the Activation
If the tool successfully resolves the issue, your Office 2021 should now be activated.
Method 3: Use Volume Licensing (for Business Users)
For business users, Office 2021 can also be activated using a Volume License. If your organization provides Office through this method, the activation steps will differ.
Step 1: Install Office via Volume Licensing Service Center
- Log in to the Volume Licensing Service Center (VLSC).
- Find the Office 2021 version your organization has purchased.
- Download and install Office 2021 on the target machine.
Step 2: Use Activation Wizard
After installation, open any Office application and follow these steps:
- Open an Office application (e.g., Word).
- A prompt should appear asking you to Activate Office.
- Choose Activate via the Internet (Volume License) and follow the instructions.
Additional Tips and Troubleshooting
Check for Updates:
Sometimes, issues can arise if the software is outdated. Make sure your Office installation is up-to-date:
- Open any Office app.
- Go to File > Account.
- Under Product Information, click Update Options > Update Now.
Ensure You’re Signed in to the Correct Microsoft Account:
- If you’re using a Microsoft 365 or Office 2021 subscription, make sure you’re signed in to the correct Microsoft account associated with your license.
Summary
Activating Microsoft Office 2021 legally without a product key is possible by using either a Microsoft account and digital license, or for businesses, Volume Licensing. Both methods allow activation without the need for traditional product keys, leveraging Microsoft’s modern activation system.
If you encounter any issues, try using the Microsoft Support and Recovery Assistant or verify your account and installation status through the Microsoft Account Portal.
-

 Mobile & Apps How-To6 months ago
How to Check and Use MTN Bonus Data in 2025
-
 Hardware & Gadgets How-To10 months ago
How to recharge airtime on your Airtel Sim Card
-
 Mobile & Apps How-To8 months ago
How to unlock Acess More Bank App
-

 Mobile & Apps How-To6 months ago
MTN APN Settings for Fast Internet: A Complete Guide
-

 Mobile & Apps How-To6 months ago
How to Borrow Money from Opay Loan App?
-

 Hardware & Gadgets How-To6 months ago
How to Adjust Your Mouse Polling Rate on PC & Mac: A Complete Guide
-

 Mobile & Apps How-To6 months ago
How to Check Internet and File History on Your Computer: A Complete Guide
-

 Mobile & Apps How-To6 months ago
How to Convert Airtime to Cash in Nigeria: A Complete Guide